Why Resoling Your Dance Shoes Is Worth It
If you’ve ever asked yourself how to resole dance shoes, when to do it, and how to actually get it done, you’re already thinking like a smart dancer. Dance shoes are a genuine investment — a quality pair of ballroom heels or Latin shoes can run anywhere from $60 to over $200 — and resoling them can extend their life by months or even years. Beyond saving money, a fresh sole means better grip, smoother glides, and safer footwork on the studio floor.
Whether you’re just starting out or you’ve been dancing for a few years, understanding sole maintenance is one of the most practical skills you can pick up. Let’s walk through everything you need to know.

How to Tell When It’s Time to Resole Your Dance Shoes
Knowing when to resole is just as important as knowing how. Dance shoes don’t always give obvious signals, so here’s what to look for:
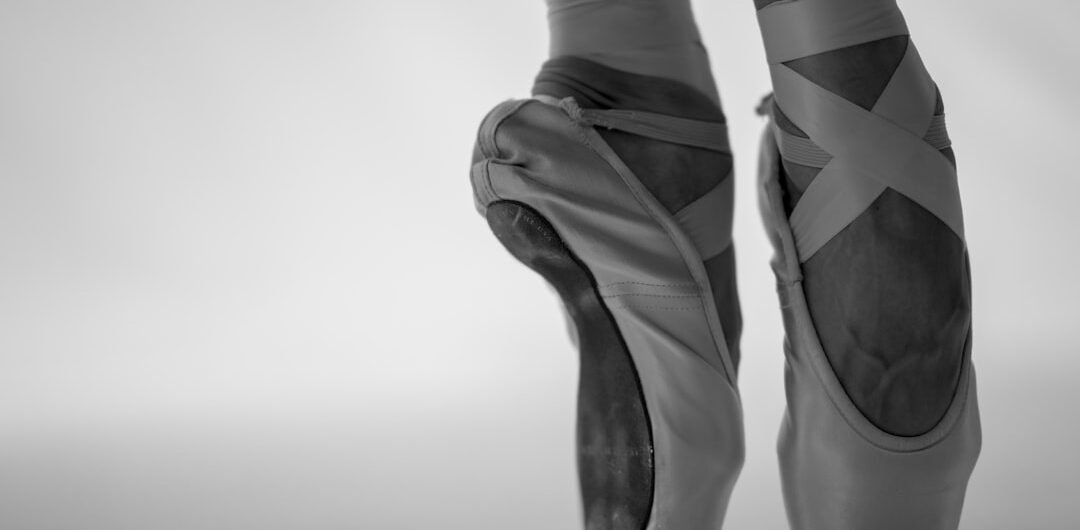
- Visible wear through the suede: The most common sign. When the suede nap on the sole looks flat, shiny, or completely smooth in high-friction areas (usually the ball of the foot and the heel), the sole has lost its key properties.
- Loss of slide control: Good suede soles give you that perfect balance between grip and glide. If you feel yourself either sticking too much or sliding uncontrollably, worn soles are often the culprit.
- Uneven wear patterns: Check the edges and corners of the sole. If one area is noticeably thinner than the rest, you may develop balance issues or even risk injury if left unchecked.
- Cracks or separation: If the sole material is peeling away from the shoe body or showing deep cracks, it’s definitely time to act.
- The “scratch test”: Run your fingernail lightly across the suede. Fresh suede scratches easily and leaves a visible mark. If it doesn’t, the suede is too compressed and worn to do its job.
As a general rule of thumb, recreational dancers who practice two to three times per week will typically need to resole every 6 to 12 months. Competitive dancers or those training daily may need it every 3 to 4 months.
Understanding Dance Shoe Sole Types
Before you resole, it helps to know what type of sole you’re working with. The most common types include:
- Suede soles: The gold standard for ballroom, Latin, and social dancing. Suede provides that signature controlled slide on sprung hardwood floors.
- Leather soles: More durable but less common. These suit certain styles like tap or character shoes and provide a harder, crisper sound and feel.
- Split soles: Often found in jazz or contemporary shoes. These offer flexibility but still benefit from periodic resoling.
- Rubber soles: More common in street-style or hip-hop sneakers. These rarely need resoling in the traditional sense but can be patched.
For the purpose of this guide, we’ll focus primarily on suede soles, since these are the most frequently resoled and the most relevant to ballroom, salsa, swing, and tango dancers.
Can You Resole Dance Shoes Yourself? DIY vs. Professional Resoling
The good news is yes — you absolutely can resole your dance shoes at home, and it’s more accessible than most people think. The key question is whether a DIY job will give you results close to what a professional cobbler or dance shoe specialist offers.
DIY Resoling
For DIY resoling, you’ll need a few key supplies:
- Replacement suede sole sheets: Look for products like Energetiks Suede Sole Sheets or Trimfit Suede Sole Replacement Kits, both of which are readily available on Amazon. These come pre-cut or in sheets you trim yourself.
- Strong contact cement or shoe glue: Barge All-Purpose Cement is a favorite among cobblers and DIY shoe repairers. It’s waterproof, flexible, and bonds well to both suede and shoe materials.
- Scissors or a sharp craft knife
- Sandpaper (medium grit) to roughen surfaces for better adhesion
- A clamp or heavy books to press the sole while it cures
Step-by-Step DIY Resoling
- Remove the old sole: Carefully peel or cut away the worn sole. Use a flat tool to help separate the layers without damaging the shoe body.
- Clean the surface: Remove any old glue residue. Sand the bottom of the shoe lightly to create a rough surface that will bond more effectively.
- Trace and cut your new sole: Place the shoe on your suede sheet and trace around it with a pencil or chalk. Cut slightly outside the line — you can trim the excess once it’s glued down.
- Apply contact cement: Following the product instructions, apply a thin, even coat of Barge cement to both the shoe base and the back of the new suede piece. Allow it to become tacky (usually 5–10 minutes).
- Press and bond: Carefully align and press the suede sheet onto the shoe. Press firmly and apply even pressure. Use clamps or weighted books and let it cure for at least 24 hours.
- Trim the edges: Once fully cured, use sharp scissors or a craft knife to trim away excess suede flush with the shoe’s edge.
- Finish the edges: Optionally, use sandpaper to smooth the edges and give it a professional finish.
Professional Resoling
If your shoes have complex construction, expensive materials, or you simply don’t feel confident with a DIY approach, taking them to a professional cobbler is the way to go. Many dance-specific shoe brands like Capezio and Ray Rose either offer resoling services directly or can point you to authorized repair specialists. Expect to pay between $20 and $50 for professional resoling, which is still far cheaper than a new pair.
How to Make Your Dance Shoe Soles Last Longer
A little prevention goes a long way. Here are some practical habits that will extend the life of your soles significantly:
- Only wear dance shoes on appropriate floors: Never walk outside or on rough surfaces in your dance shoes. The suede wears down almost instantly on pavement or carpet.
- Brush your soles regularly: Use a suede brush (like the ones from Lincoln or Kiwi, available on Amazon) before and after each session to restore the nap and remove dirt. This single habit can dramatically slow down sole wear.
- Store shoes in a breathable bag: Avoid leaving them at the bottom of a dance bag where the soles can get compressed. A breathable shoe bag or box keeps the shape and sole integrity intact.
- Rotate between two pairs: If you dance frequently, having two pairs and alternating between them lets each pair recover and reduces wear rate.
- Avoid moisture: Suede and water are not friends. If you sweat heavily, sprinkle a little cornstarch on the soles after dancing to absorb moisture.
Frequently Asked Questions About Dance Shoe Resoling
Can all dance shoes be resoled?
Most can, but shoes with very thin or cheaply constructed soles may not be worth resoling. If the upper (the fabric or leather part) is in poor shape, resoling won’t save the shoe. Inspect the whole shoe before committing to a resole.
How long does a DIY resole job last?
With quality materials and proper technique, a DIY resole can last just as long as the original sole — often 6 to 12 months for regular dancers. Using high-quality adhesive like Barge cement is key to durability.
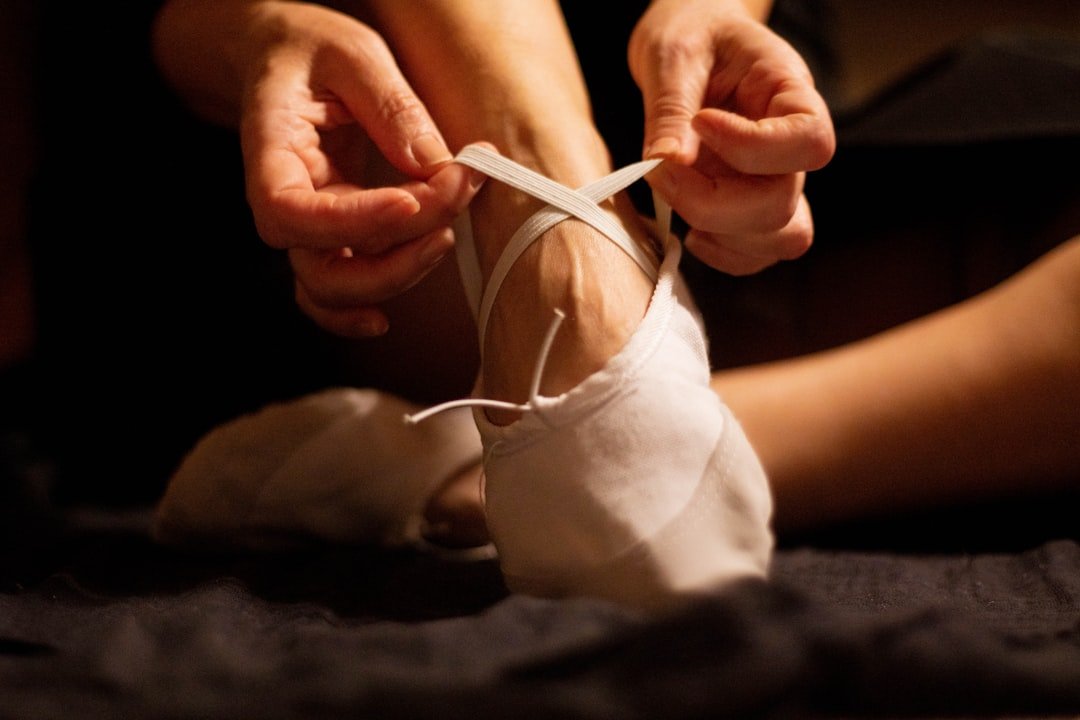
What if I have heeled dance shoes?
Heeled shoes like ballroom or Latin heels have a separate heel tip that also wears down. You can replace heel tips independently — these are also available on Amazon in various sizes and are even easier to swap out than a full sole replacement.
Keep Dancing, Keep Your Shoes in Shape
Understanding how to resole dance shoes, when to do it, and how to make it last is truly one of the best investments you can make as a dancer. Whether you go the DIY route with a suede sole sheet and some Barge cement or take your favorite pair to a trusted cobbler, a fresh sole restores your confidence on the floor and protects your body from unnecessary strain.
Don’t wait until your soles are completely destroyed — check them regularly, brush them after every session, and resole at the first clear signs of wear. Your feet, your wallet, and your dance partners will thank you.
Ready to get started? Grab a suede sole sheet kit on Amazon, clear a space on your kitchen table, and give your dance shoes the refresh they deserve. And if you found this guide helpful, share it with a fellow dancer who could use the same advice — because great dancing starts from the ground up.